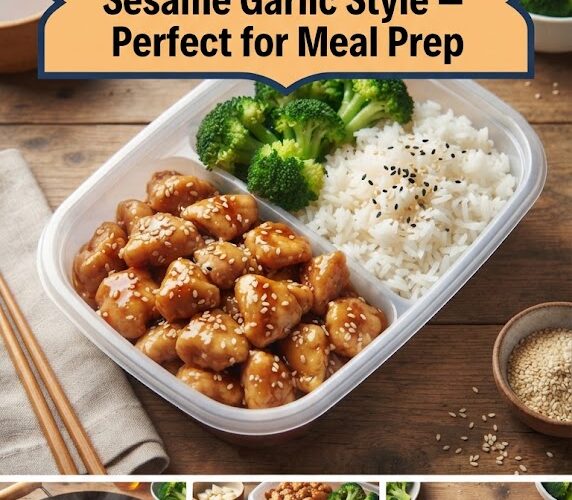
In the fast-paced modern world, the struggle to maintain a healthy diet while balancing a demanding career, social life, and personal wellness is a universal challenge. Enter the “Meal Prep” revolution—a lifestyle shift that has transformed how millions of people approach nutrition. Among the pantheon of meal-prep legends, one dish stands above the rest for its incredible flavor profile, ease of preparation, and nutritional density: Boneless Chicken Sesame Garlic Style.
This isn’t just another chicken recipe; it is a strategic tool for your kitchen. By combining the aromatic punch of fresh garlic, the nutty richness of toasted sesame oil, and the lean protein of boneless chicken breast or thighs, you create a meal that stays delicious from Monday through Friday. This guide provides an exhaustive look at how to master this dish, optimize it for your health goals, and ensure your fridge is stocked with gourmet-quality fuel.
Why Sesame Garlic Chicken is the King of Meal Prep
When choosing a meal-prep recipe, several factors come into play: longevity in the fridge, ease of reheating, and flavor fatigue. Sesame Garlic Chicken excels in all three categories.
- Flavor Resilience: Unlike cream-based sauces that can separate or delicate greens that wilt, the sesame-garlic glaze actually permeates the chicken fibers over time. By day three, the flavors often feel deeper and more developed than they did on day one.
- Texture Integrity: Boneless chicken, when cooked correctly, maintains a pleasant texture even after a spin in the microwave. The “glaze” creates a protective barrier that prevents the meat from drying out.
- Versatility: This chicken is a chameleon. You can serve it over jasmine rice, toss it into a cold salad, wrap it in a tortilla, or eat it alongside steamed vegetables. It fits into Paleo, Keto (with modifications), and standard high-protein diets effortlessly.
The Essential Ingredient Breakdown
To achieve restaurant-quality results at home, you must understand the “why” behind the ingredients. Each component in the Sesame Garlic profile serves a specific culinary purpose.
The Protein: Boneless Chicken
- Chicken Breast: The leanest option, perfect for those tracking macros or aiming for weight loss. The key is not overcooking it, as lean meat can turn “rubbery.”
- Chicken Thighs: Preferred by many chefs for meal prep because they contain more fat, making them more forgiving during the reheating process. They stay juicy and have a richer flavor.
The Aromatics: Garlic and Ginger
- Fresh Garlic: Do not use the pre-minced jars if you can avoid it. Freshly smashed and minced garlic releases essential oils that provide that signature “bite.”
- Fresh Ginger: Ginger adds a bright, peppery heat that cuts through the saltiness of the soy sauce. It is also a powerhouse for digestion—a bonus for meal preppers.
The Umami Base: Soy Sauce or Liquid Aminos
- Soy Sauce: Provides the salty, savory foundation.
- Tamari: A gluten-free alternative that is slightly richer and less salty.
- Coconut Aminos: The go-to for Paleo and Keto enthusiasts; it offers a sweeter, soy-free profile with significantly less sodium.
The Liquid Gold: Toasted Sesame Oil
This is the soul of the dish. A little goes a long way. Toasted sesame oil should be used at the end of the cooking process or in the marinade to preserve its delicate, nutty aroma which can dissipate under extreme high heat.
The Sweetener: Honey, Maple Syrup, or Brown Sugar
A touch of sweetness is required to balance the salt and acidity. It also aids in “caramelization,” giving the chicken those beautiful charred edges and a sticky coating.
The Pro-Technique: Velveting Chicken
If you’ve ever wondered why restaurant chicken is so much silkier and more tender than home-cooked chicken, the secret is a Chinese technique called “Velveting.”
For meal prep, this is a game-changer. It involves coating the raw chicken pieces in a mixture of cornstarch (or arrowroot powder) and a splash of liquid before searing. The starch creates a thin, protective layer that locks in moisture and helps the sauce cling to the meat perfectly.
How to Velvet for Sesame Garlic Chicken:
- Cut your boneless chicken into bite-sized cubes.
- Toss with 1 tablespoon of cornstarch, 1 tablespoon of soy sauce, and a teaspoon of oil.
- Let it sit for 15 minutes before hitting the pan.
The Ultimate Sesame Garlic Chicken Recipe
This recipe is designed to yield 5-6 servings, perfect for a full work week of lunches.
Ingredients
- 2.5 lbs Boneless Skinless Chicken (Breasts or Thighs), cubed.
- 1/4 cup Soy Sauce (low sodium preferred).
- 3 tbsp Honey or Maple Syrup.
- 1 tbsp Toasted Sesame Oil.
- 5 cloves Garlic, minced.
- 1 tbsp Fresh Ginger, grated.
- 1 tbsp Rice Vinegar (adds necessary acidity).
- 1 tbsp Sriracha or Chili Flakes (optional, for heat).
- 2 tbsp Cornstarch (for velveting).
- Garnish: Toasted sesame seeds and sliced green onions.
Step-by-Step Instructions
1. Preparation and Marinating
In a large bowl, whisk together the soy sauce, honey, sesame oil, garlic, ginger, and rice vinegar. Reserve half of this mixture in a separate small jar (this will be your finishing glaze). With the remaining half in the bowl, toss in your cubed chicken and the cornstarch. Let this marinate for at least 20 minutes in the refrigerator.
2. The Sear
Heat a large skillet or wok over medium-high heat with a high-smoke-point oil (like avocado or canola oil). Do not use olive oil here as it may burn. Add the chicken in a single layer. Pro Tip: Do not crowd the pan. Cook in batches if necessary to ensure the chicken sears rather than steams. Cook for 3–4 minutes until a golden-brown crust forms.
3. The Glaze
Once all the chicken is browned and nearly cooked through, pour the reserved sauce into the pan. The residual heat and the cornstarch on the chicken will cause the sauce to thicken almost instantly. Toss the chicken continuously for 1–2 minutes until every piece is coated in a sticky, glossy lacquer.
4. Cooling
This is the most overlooked step in meal prep. Never put hot chicken directly into a sealed container. This creates steam, which leads to soggy chicken and potential bacterial growth. Spread the chicken out on a baking sheet to cool to room temperature before portioning.
Optimized Side Dishes for the Perfect Meal Prep
To make this a complete meal, you need sides that complement the Sesame Garlic flavor while maintaining their own integrity in the fridge.
1. The Grain Base
- Jasmine Rice: The classic choice. Its floral aroma pairs beautifully with sesame.
- Quinoa: For a protein and fiber boost. Quinoa holds up exceptionally well and doesn’t get “clumpy” like brown rice sometimes does.
- Cauliflower Rice: For the low-carb crowd. Sauté it with a little garlic and salt to keep it from being bland.
2. The Vegetable Component
- Steamed Broccoli: The “trees” of the broccoli are perfect for soaking up any extra sesame garlic sauce.
- Snap Peas and Carrots: These provide a much-needed crunch and sweetness.
- Garlic Sautéed Bok Choy: A traditional pairing that adds an elegant, leafy green element.
Nutrition and Macro-Tracking
For those focused on fitness, Sesame Garlic Chicken is a nutritional powerhouse.
- Protein: Chicken is a high-biological-value protein, meaning it contains all essential amino acids for muscle repair.
- Healthy Fats: Sesame oil provides polyunsaturated and monounsaturated fats, which are heart-healthy.
- Micronutrients: Garlic contains allicin, known for its immune-boosting properties. Ginger is a natural anti-inflammatory.
Estimated Macros (per serving with 1/2 cup rice):
- Calories: 450–500 kcal
- Protein: 35g–40g
- Carbohydrates: 45g–50g
- Fats: 12g–15g
Advanced Storage and Food Safety Tips
The success of your meal prep depends on how you store it.
Container Choice
Invest in high-quality glass containers with airtight lids. Glass is superior to plastic for several reasons:
- It doesn’t retain odors or stains from the soy sauce.
- It is safer for reheating (no BPA leaching).
- It keeps the chicken crisper.
The “Stay Fresh” Timeline
- Refrigerator: Consumed within 4 days for peak freshness.
- Freezer: Sesame Garlic Chicken freezes surprisingly well. Store in individual portions. When ready to eat, thaw overnight in the fridge and then reheat. It will stay good in the freezer for up to 3 months.
The Reheating Secret
To avoid dry chicken, add a teaspoon of water or chicken broth to the container before microwaving. Cover it loosely with a lid or damp paper towel. This creates a “steam room” effect that revitalizes the sauce and keeps the meat tender.
Customizing Your Sesame Garlic Chicken
Variety is the spice of life, and even the best recipe can become monotonous if eaten every day. Here is how to pivot the flavor profile:
- The Spicy Kick: Add 2 tablespoons of Gochujang (Korean chili paste) to the sauce for a spicy, fermented depth.
- The Tropical Twist: Swap half the honey for pineapple juice and add fresh pineapple chunks to the pan during the final glaze.
- The Nutty Crunch: Add roasted cashews or peanuts at the very end for a texture contrast that mimics Kung Pao chicken.
- The Zesty Version: Add the zest and juice of one lime to the sauce to brighten the entire dish.
The Economics of Meal Prepping Chicken
In an era of rising food costs, boneless chicken remains one of the most cost-effective protein sources in the USA. Buying in bulk (family packs) at stores like Costco or Walmart can significantly reduce your price per meal.
By preparing 5 meals at home using this Sesame Garlic recipe, you are likely spending between $2.50 and $4.00 per meal, depending on your choice of organic vs. conventional ingredients. Compare this to a standard takeout bowl which ranges from $12.00 to $18.00, and the savings over a year can exceed $2,500.
Common Mistakes to Avoid
- Overcrowding the Pan: If you put too much chicken in at once, the temperature of the pan drops. Instead of searing, the chicken will release juices and boil in its own liquid, resulting in a grey, rubbery texture.
- Using Old Spices: Garlic powder and ground ginger are okay in a pinch, but they lack the aromatic oils of fresh produce. If you want that “wow” factor, go fresh.
- Forgetting the Acid: A sauce made only of soy and sugar is “one-note.” The rice vinegar or a squeeze of lime is essential to cut through the richness and make the flavors pop.
- Improper Slicing: Cut your chicken into uniform pieces. This ensures that every piece finishes cooking at the exact same time.
The Psychology of Meal Prep
Beyond the physical health benefits, meal prepping Boneless Sesame Garlic Chicken provides a significant mental health boost.
- Decision Fatigue: By deciding what to eat on Sunday, you save yourself from the mental drain of choosing a meal every evening when your willpower is lowest.
- Self-Care: Taking the time to cook high-quality, delicious food for yourself is a fundamental act of self-respect. You are telling yourself that your health and your palate are priorities.
- Time Reclimation: You regain roughly 30–60 minutes every evening. Use this time for a workout, a hobby, or simply relaxing.
Conclusion: Elevate Your Weekdays
The Meal-Prep Boneless Chicken Sesame Garlic Style is more than just a recipe; it’s a system for better living. It strikes the perfect balance between the comfort of home cooking and the efficiency of a professional kitchen. With its intoxicating aroma, sticky-sweet glaze, and reliable nutrition, it is a dish that you will find yourself returning to week after week.
Stop settling for bland “chicken and broccoli” meal preps. Embrace the bold, savory world of Sesame and Garlic. Your future self—sitting at your desk on a Wednesday afternoon, opening a container of gourmet-smelling, perfectly glazed chicken—will thank you.
Summary Checklist for Success:
- Use boneless chicken thighs for maximum juiciness.
- Velvet the chicken with cornstarch for that “silky” texture.
- Use fresh garlic and ginger for the best aroma.
- Let the chicken cool completely before sealing the containers.
- Reheat with a splash of water to keep it moist.
By following this comprehensive guide, you are now equipped to conquer your week with flavor and health. Happy prepping!